
When it comes to bedroom decor, wall sconces add a touch of elegance and functionality. However, determining the right height to hang wall sconces next to the bed can be a bit tricky.
The height needs to be not only visually pleasing but also practical for your day-to-day usage. This article will provide detailed guidance on how high to hang wall sconces next to your bed, ensuring both aesthetic harmony and functional illumination for your bedroom sanctuary.
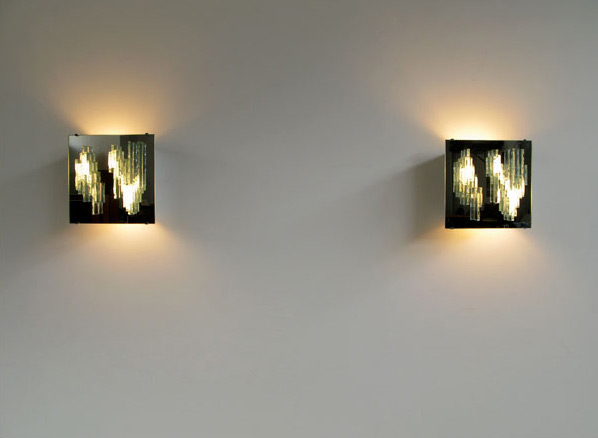
Wall sconces serve a dual purpose in bedroom decor, offering both aesthetic charm and practical lighting solutions. They contribute to the ambiance of the room, accentuating the overall design scheme, and providing a soft, inviting glow.
Meanwhile, their location next to the bed offers convenience for tasks like reading before sleep or navigating the room in low light conditions. The purpose of this guideline is to help homeowners and decorators strike the perfect balance between design and functionality when hanging wall sconces next to the bed.
Contents
Measurements
Measuring the Height of Your Bed
To determine the correct height for hanging wall sconces, start by measuring the height of your bed. Place the end of the measuring tape on the floor and extend it to the top edge of your mattress.
This measurement helps to establish a baseline for proper positioning of the sconces. It is important to ensure that the light from the sconce doesn’t hit your eyes directly when you’re sitting or lying on the bed.
Calculating the Correct Height for the Wall Sconces
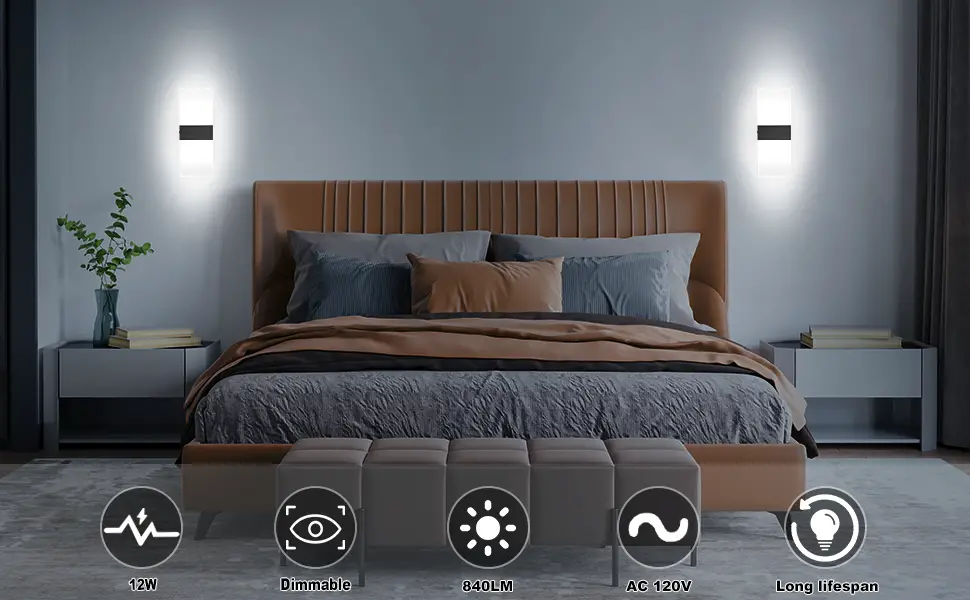
Once you’ve established the height of your bed, the next step is to calculate the optimal height for your wall sconces. As a general rule, sconces should be hung at a height where the bottom of the sconce is around 20 to 30 inches above the mattress.
This places the sconce at a comfortable viewing level when sitting up in bed and avoids any harsh direct lighting. However, this rule isn’t one-size-fits-all. Depending on your bed’s height, your personal preference, and the specific design of your sconces, you might need to adjust the height slightly.
Remember, the ultimate goal is to create a balanced, harmonious, and functional lighting setup.
The Ideal Height
Discussing the General Rule for Sconce Height
The commonly accepted principle in interior design suggests that the base of the wall sconces should be approximately 20 to 30 inches above the mattress level. This height ensures that the sconces provide sufficient illumination for tasks such as reading while preventing the light from being too harsh or direct.
It’s also positioned perfectly to create an appealing aesthetic balance between the bed and the lighting fixtures.
However, these guidelines are not set in stone, and the optimal sconce height depends on a variety of factors, including the style of your sconce, the height of your ceiling, and the overall design of your bedroom.
Situational Adjustments for Personal Comfort and Design Style
While the general rule provides a useful starting point, it’s important to adjust the sconce height based on personal comfort and the specific design style of your bedroom.
If you tend to sit up in bed and read, you might want to hang the sconces slightly higher to ensure that the light source is not shining directly into your eyes. Alternatively, if your sconces have a long drop, hanging them lower might add more style to your room.
Furthermore, the height of your ceiling and the overall scale of your bedroom can also influence the optimal sconce height. For a harmonious look, make sure that your sconces are in proportion with your bed and other furniture in your bedroom.
Installation
Step 1: Mark the Desired Height
Start by first considering the height of your mattress and marking the spot where the base of the sconce should ideally be (usually 20 to 30 inches from the mattress top). Use a pencil to make a small mark on the wall to guide your installation.
Step 2: Confirm Positioning
Keep your sconce against the wall at the marked point to visually confirm if the placement is aesthetically pleasing and practical for your usage. Make adjustments to the mark, if necessary.
Step 3: Locate the Stud
Use a stud finder to locate the nearest wall stud where you plan to hang the sconce. If there’s no stud, you’ll need a wall anchor to secure the fixture.
The stud is a crucial part of the wall structure that can securely hold the weight of the sconce. It’s typically located every 16 to 24 inches apart on the incenter in most homes.
After you’ve located the stud, mark its center with a pencil. This is where you’ll want to drill for your sconce. If a stud is not conveniently located where you want to hang the sconce, don’t despair.
You can use a heavy-duty wall anchor designed for drywall. This anchor, when installed properly, provides a secure hold in the absence of a stud.
Step 4: Drill Pilot Holes
Once you locate the stud or place the wall anchor, use a drill to make pilot holes at the marked spot. The hole should be large enough to accommodate the sconce’s mounting hardware.
While drilling the pilot holes, ensure that the drill bit you use is slightly smaller than the size of the screws provided with the sconce’s mounting hardware.
This will help the screws to grip firmly into the wall or the stud. Remember, the pilot holes are crucial as they prevent the wall or stud from splitting when you insert the screws.
After drilling the holes, remove any dust or debris from the area with a clean, dry cloth. This ensures a clean and tidy installation. Finally, if you’re using a wall anchor, insert it into the hole before proceeding with mounting the sconce.
Step 5: Install the Mounting Bracket
Attach the sconce’s mounting bracket to the wall using the screws provided. Make sure it’s secure and level.
When installing the mounting bracket, align the holes of the bracket with the drilled pilot holes. Next, insert the screws through the holes of the mounting bracket into the wall.
As you screw them in, make sure to not overtighten them as it could cause stripping or damage to the wall. Tighten until the bracket is firmly attached to the wall and does not wobble or move.
Double-check the positioning of the bracket. It should be level and at the correct height – remember, this will dictate the final position of the sconce.
If you’re using a wall anchor, the screw should go into the anchor itself. Now, your mounting bracket is successfully installed and you’re ready to move on to the next step: attaching the sconce to the bracket.
Step 6: Connect the Wires
Before attaching the sconce to the mounting bracket, connect the fixture’s wires to your home’s electrical wires as per the manufacturer’s instructions. Always remember to switch off the power at the breaker box before working with electrical wires.
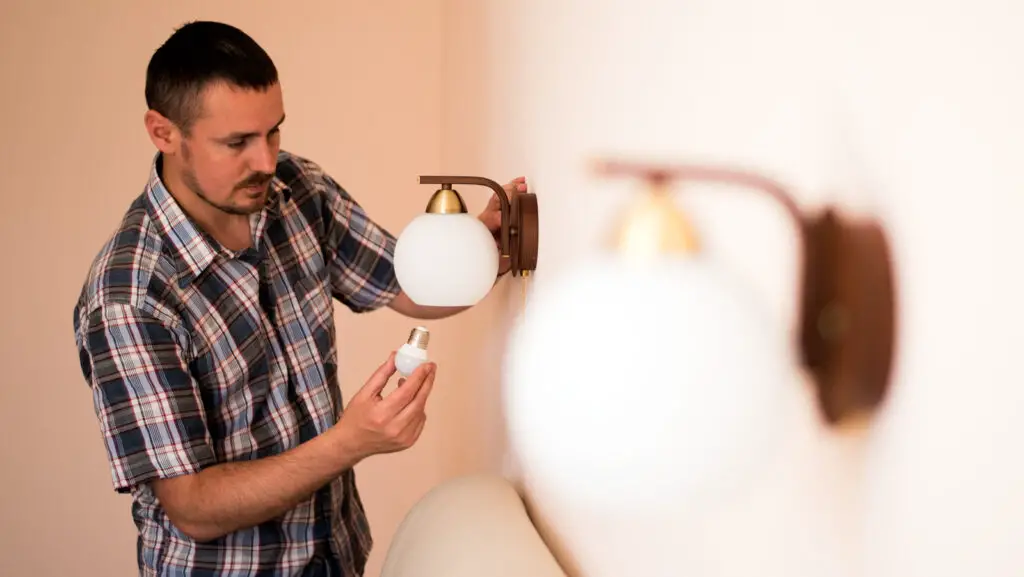
Step 7: Attach the Sconce
Now, attach the sconce to the mounting bracket. Once it’s secure, restore the power, turn on the sconce, and enjoy your newly installed bedside lighting!
After you have securely fixed the mounting bracket and connected the wires, it’s time to attach the sconce itself. Place the sconce onto the mounting bracket, ensuring the fixture aligns properly with the bracket.
Depending on the style of the sconce, it may attach to the bracket with additional screws or may simply hang onto it. Once the sconce is positioned, screw in any necessary screws to secure the fixture to the bracket, ensuring it is firm and stable.
Finally, install the light bulb according to the manufacturer’s specifications.
Remember, the height positioning of your sconce is crucial for functional bedside lighting. The rule of thumb is to hang wall sconces next to the bed at about eye level while sitting up in bed, or between 55 to 65 inches from the floor.
Make sure to adjust the sconce’s position if necessary to achieve this height. Once the sconce is secure and at the right height, restore the power and switch on the light. Admire your work – you have successfully installed a wall sconce next to your bed!
Related Topics:
Conclusion
In summary, wall sconces bring a blend of elegance and practicality to your bedroom decor. The placement height of these fixtures can significantly impact not only the ambiance of the room but also their functionality.
As a guideline, wall sconces should be installed at a height where the bottom of the sconce is approximately 20 to 30 inches above the mattress. This places the sconces within a comfortable viewing level when you’re sitting up in bed and prevents unpleasant direct lighting.
However, these are not hard-and-fast rules. Factors such as your comfort, the bed’s height, the sconce’s design, and the overall aesthetics of the room can necessitate adjustments. The ultimate goal is to achieve a harmonious interplay of design and functionality in your bedroom sanctuary.
By following these guidelines and adapting to your tastes, you can successfully install wall sconces next to your bed for a cozy, inviting, and aesthetically pleasing bedroom environment.
FAQs
Can I install more than one wall sconce next to my bed?
Yes, you certainly can. However, the number of wall sconces to install depends on the size of your bed, the wall space available, and your lighting needs. If your bed is large or you require ample light, you may choose to install more than one sconce. However, remember to maintain the ideal placement height for each to ensure optimal lighting and aesthetic appeal.
What if my bed’s height is unconventional? How should I adjust the position of the wall sconce?
If your bed’s height is abnormally high or low, you should adjust the position of the sconce accordingly. The goal is to have the bottom of the sconce 20 to 30 inches above the mattress, and within a comfortable viewing level when sitting up in bed. This ensures the sconce provides effective lighting and avoids direct, unpleasant light. Always consider your comfort and the sconce’s functionality when deciding on the placement.
1 thought on “How High To Hang Wall Sconces Next To Bed”