You may want to know about the advantages and disadvantages of Incandescent lamps. Don’t you want to?
If so you are at the right spot because in this article I am going to discuss Incandescent lamps with their types, advantages, and disadvantages.
And at the end, we will do a compression between LED light and Incandescent bulb light.
So, keep reading till the end but first, start with what is an incandescent bulb.
Contents
What is an Incandescent Bulb?
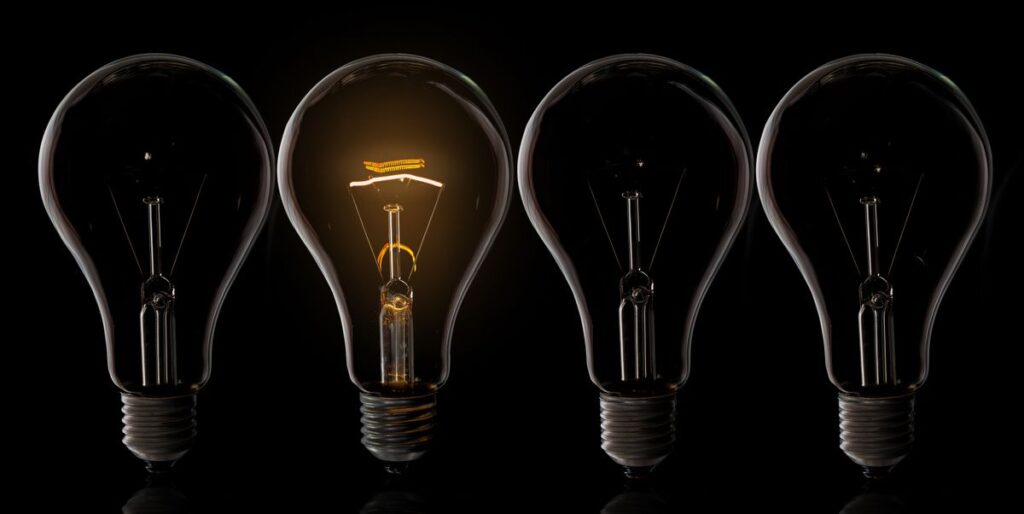
The electric bulbs that use electric current to get heated and produce visible light are known as Incandescent bulbs. These bulbs are made of wire filament and filled with inert gas because they are made of glass as well.
In simple words, you can say they have used electric current to generate light energy.
No doubt, now LED light bulbs are to take over them. Incandescent bulbs are still known as a traditional source of light. Especially these bulbs are especially widely used in lamps.
So, their trend is still alive in lamps and they provide a traditional and unique look to their lovers.
Why it is called Incandescent?
It is called an Incandescent light bulb because it follows the principle of obtaining light from heat.
Advantages and Disadvantages of Incandescent Lamps
Advantages of Incandescent lamp
Low cost: Incandescent bulbs are among the least expensive types of lighting available. They can be bought at most hardware and home improvement stores, as well as online, and usually cost much less than their LED and fluorescent counterparts.
Wide variety of bulbs: Incandescent bulbs come in a wide range of shapes, sizes, and wattages. This makes it easy to find one that fits your space and lighting needs perfectly.
Easy to install: Incandescent lamps are very easy to install and replace should the need arise. This makes them ideal for do-it-yourselfers who want to save money on installation costs.
Warm, inviting light: Incandescent lamps provide a warm, welcoming light that is perfect for cozy spaces like bedrooms and living rooms.
Longer lifespan than many alternatives: Although they aren’t as energy efficient as LED or fluorescent bulbs, incandescent lamps are still capable of lasting for up to 1,000 hours before needing to be replaced.
Low heat output: Incandescent bulbs emit relatively low amounts of heat, making them safe and comfortable for use in close-quartered spaces.
Easy dimming capability: Most incandescent bulbs can easily be dimmed, allowing you to customize the amount of light in a given space.
High lumens per watt output: Incandescent bulbs are very efficient at producing large amounts of light compared to other types of bulbs.
Environmentally friendly disposal: Incandescent lamps can be disposed of without risk of harming the environment, as they contain no hazardous materials.
Economical: Incandescent bulbs are one of the most cost-effective types of lighting available, as they require little electricity to function and can be purchased at a low cost.
Disadvantages of Incandescent lamps
Low energy efficiency: Incandescent lamps are not very energy efficient and can waste a lot of electricity when running at full brightness.
Short lifespan: Incandescent bulbs need to be replaced frequently due to their relatively short lifespan of around 1,000 hours.
High heat output: Although not as high as some other types of bulbs, incandescent lamps still emit a considerable amount of heat which can be uncomfortable in some spaces and be potentially dangerous.
Poor color rendering: Incandescent bulbs provide a warm light that is not ideal for tasks that require accurate color rendering such as art or graphic design work.
Difficult to recycle: As incandescent bulbs contain glass and metal components, they are not easily recycled and may require special disposal.
May not work with electronic dimmers: Dimmer switches are incompatible with some incandescent lamps, so it’s important to check that the bulb is suitable before purchasing.
Sensitive to voltage fluctuations: Incandescent bulbs are sensitive to voltage fluctuations and can burn out if the power supply is not stable.
Not suitable for outdoor use: Incandescent lamps are not recommended for outdoor use due to their low energy efficiency, which can make them inefficient in cold weather conditions.
Dim results: The dimming capabilities of incandescent bulbs vary depending on the type of bulb, as some are not capable of producing very dim light.
Prone to breaking: Incandescent bulbs are prone to breaking due to their fragile nature and should be handled with care when replacing them.
Types of Incandescent bulb Lights
Standard Incandescent bulb Lights
The typical standard Incandescent light bulbs were invented by Thoma Alva Edison. It is known as a sealed glass bulb that has a filament inside.
When you switch on the lamp, the electricity passes through the bulb’s filament and it gets heated and as a result, the filament emits radiation.
So, at high temperatures, the thermal traditions produce a visible amount of light from the filament. It is made of glass so it can spread the light easily.
Tungsten Halogen Bulbs
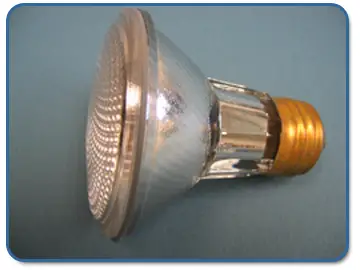
The Incandescent lamps with halogen gases that are sealed inside the bulb and the inner coating help to reflect heat back to the filament- known as Tungsten Halogen Bulbs.
It can provide the same light output with less power as a standard incandescent bulb. Halogen gas filling increases the durability of the bulb and makes it more long-lasting than a standard incandescent bulb.
So, you don’t need to replace them soon. That directly reduces your maintenance cost as well.
Reflector Lamps
Reflector lamps can spread light in different directions because of their specific design. The silver coating on its sides plays a mirror role. So it can reflect all the light waves that are coming back or on other sides to the front.
Spotlighting and floodlighting both are examples of reflector lamps. These lamps are used for large areas of a home. Because they provide high-power light and cover a large area.
Tubular Halogen Bulbs
Tubular tungsten halogen bulbs are most commonly used and popular in floor lamps that can provide general lighting to a large area. They need a high temperature to operate so they can provide better energy efficiency than any other standard Incandescent-type bulb.
How Incandescent Lamps Construct
As I told you above the Incandescent bulb was first made by Thomas Elva Edison in 1879. With a simple structure, it has a metal contact base that is connected to the end of a circuit.
Further, these metal contacts through the wires that are attached to the filament.
This tungsten filament is sealed in a glass cover in the center that is the main cover of an Incandescent bulb as well.
The bulb is filled with inert gasses like argon nitrogen and argon. When you turn on the bulb, the current flows in the tungsten filament through wires, and as a result, the bulb provides a high-power light.
LED vs Incandescent light; Comparison

Whenever we do a comparison between LED and Incandescent bulbs, it really makes a difference. Let me show you how.
Advantages of LED Lighting
LED lighting is quickly becoming the preferred choice for many. It has a longer lifespan, uses less energy, and can provide more light than incandescent products. One of the greatest advantages of LED lighting is its lower electricity usage. Since LEDs use about 80% less energy than traditional light bulbs, you’ll be able to save money on your electricity bill.
LEDs are also much brighter and can provide a better quality of light than incandescent bulbs. They come in a variety of colors, so you can find the perfect lighting for any room. Additionally, LEDs have an incredibly long lifespan up to 50 times longer than traditional light bulbs.
Most importantly LED lights use 75% less amount of energy than an incandescent bulb. So, LED bulbs are more efficient than Incandescent bulbs in both power and durability.
LED bulbs have electrons that lead to creating photons in the form of light we see. These photons provide the same light and brightness as an Incandescent bulb but take less amount of energy.
So, you can say that LED bulbs save electricity as well.
Which Type of Lighting is Right For You?
When it comes to choosing between LED and incandescent lamps, there are a few factors to consider. The cost of installation is one of the most important considerations, as LEDs can be more expensive to install initially.
The energy savings you’ll receive by using LED lamps should also be taken into account. While these fixtures may require a larger upfront investment, they will eventually save you money in the long run due to their reduced energy consumption.
It’s also important to consider the type of lighting you desire for the space. LEDs can provide a cold light source, while traditional bulbs offer a warmer glow. Depending on the area in which the lamps will be installed, one may be more suitable than the other.
Related Topic:
Wrap up
You can see the clear difference between an Incandescent bulb and other types of light bulbs. No doubt the trend of Incandescent bulbs is over. But still, there are people who love traditional things especially when it comes to lighting up their rooms.
Are you from these people? If so do provide your answer in the comment section.
Furthermore, in-room lamps, there is still a trend of using Incandescent bulbs. Because they provide a controlled power light.
So, keep in mind the advantages and disadvantages of Incandescent lamps while choosing.
FAQs
Are Incandescent Lamps Safe?
They are safe but not more than an LED bulb lamp because they emit polluting radiation in a lesser amount. Further, they produce a little bit of heat as well. So in winter, they are more suitable but in summer they may create some hassle in the form of overheating (usually one or two degrees).
Are Incandescent lamps brighter than LED?
Both have almost the same brightness level and provide the same amount of light. But LED light lamps are more energy-efficient and long-lasting than Incandescent bulb lamps.
Related Topic: How to Replace a 3-way Lamp Switch
Thank you for any other wonderful post. The place else may anybody get that type of information in such an ideal way of writing? I’ve a presentation next week, and I am at the look for such info.
Thank you for your kind words!
The fastest way to make your wallet thick is found. https://hierbalimon.es/promo
My Free Online Kitchen Design Journey
Once I finalized my dream kitchen layoutтАЪ exporting the design was surprisingly straightforward. The online tool offered several options; I chose to download high-resolution imagesтАЪ perfect for sharing with family and friends. The images were incredibly detailedтАЪ capturing every element of my designтАЪ from the subtle grain of the oak cabinets to the precise dimensions of the countertops. I also created a detailed PDF planтАЪ which included measurementsтАЪ appliance specificationsтАЪ and a comprehensive materials list. This was invaluable for potential contractorsтАЪ providing them with all the information they needed to accurately estimate costs and timelines. Sharing my design was incredibly easy. I emailed the images and PDF to several contractors I’d contactedтАЪ and the clarity of the visuals made communication seamless. They were all impressed by the level of detail and professionalism of the digital plans. I also shared my design on social mediaтАЪ posting the images to my Instagram account. My friends and family were amazed by the transformationтАЪ praising the modernтАЪ yet cozy feel of the kitchen. The online tool even allowed me to create a 3D walkthroughтАЪ which I shared with a friend who’s considering a kitchen renovation of her own. She was particularly impressed by the realistic rendering of the lighting and the overall atmosphere of the space. The ability to easily export and share my design was a fantastic feature of the software. It facilitated clear communication with contractorsтАЪ allowed me to easily share my vision with othersтАЪ and even inspired my friend to begin her own kitchen design journey. The entire processтАЪ from initial design to final export and sharingтАЪ was smoothтАЪ efficientтАЪ and incredibly rewardingтАЪ proving that designing a dream kitchen online can be both fun and incredibly practical.
https://callmeconstruction.com/bathroom/designing-a-bathroom-for-the-elderly/
[url=https://callmeconstruction.com/building/what-building-materials-did-ancient-greece-use/]https://callmeconstruction.com/building/what-building-materials-did-ancient-greece-use/[/url]
https://tradeprofinances.com/investment/gold-investment/best-industries-to-invest-in-2022/
[url=https://tradeprofinances.com/mortgage/do-mortgage-inquiries-hurt-your-credit/]https://tradeprofinances.com/mortgage/do-mortgage-inquiries-hurt-your-credit/[/url]
https://techworldtrendz.com/the-best/projectors-vs-tvs-my-home-theater-showdown/
[url=https://techworldtrendz.com/games/understanding-the-final-fantasy-vii-remake-development/]https://techworldtrendz.com/games/understanding-the-final-fantasy-vii-remake-development/[/url]
AgakRJuhq23k
Refining the Design and Adding Details
After inputting my measurements and preferencesтАЪ I dove headfirst into the exciting world of layout experimentation. KitchenCraft Pro offered a plethora of optionsтАЪ from the classic galley style to the more spacious L-shape and U-shape designs. I started by exploring the galley layoutтАЪ digitally dragging and dropping cabinets and appliances to visualize the workflow. I quickly realized it wouldn’t suit my needs тАУ the limited counter space was a major drawback. NextтАЪ I experimented with an L-shape configurationтАЪ strategically placing the sinkтАЪ stoveтАЪ and refrigerator to form an efficient work triangle. This felt more promising. I meticulously adjusted the placement of islands and peninsulasтАЪ carefully considering their impact on traffic flow and overall spaciousness. The software’s intuitive drag-and-drop functionality made this process remarkably easy and enjoyable. I even tried a daring U-shaped designтАЪ envisioning a grandтАЪ chef-like workspace. While initially appealingтАЪ I found it slightly cramped for my needs. The software allowed me to easily switch between different layoutsтАЪ instantly visualizing the impact of each change. I spent hours tweaking the arrangement of cabinetsтАЪ appliancesтАЪ and workspacesтАЪ constantly evaluating the practicality and aesthetic appeal of each configuration; I played around with different cabinet depths and widthsтАЪ experimenting with the placement of pantry units and maximizing storage space. I even considered adding a breakfast bar to one of the layoutsтАЪ envisioning family gatherings around it. The ability to instantly see the results of my adjustments was invaluableтАЪ allowing me to make informed decisions based on both functionality and personal preference. It was a truly iterative processтАЪ refining and perfecting the design until I found the perfect balance between form and function. Through this experimentationтАЪ I discovered that the L-shape layoutтАЪ with a cleverly positioned islandтАЪ provided the optimal blend of efficiency and spaciousness for my kitchen.
Experimenting with Different Layouts
I embarked on a thrilling kitchen redesignтАЪ leveraging free online tools. My goal? A stunningтАЪ functional space without breaking the bank. I spent hours exploring various platformsтАЪ comparing features and ease of use. The process felt surprisingly intuitive. I was amazed by how quickly I could visualize different layouts and experiment with various appliances and cabinetry. It was a fun and empowering experienceтАЪ proving that achieving a dream kitchen doesn’t require a hefty budget!
budzdorovkor.ru
[url=https://ademag.ru/]ademag.ru[/url]
B5XvZR9ny
Maintaining the pristine look of your black and white bathroom requires consistent effort‚ but the results are well worth it. The stark contrast of black and white highlights any dirt or grime‚ making regular cleaning crucial. A weekly cleaning routine is recommended to prevent buildup and maintain that showroom shine. Start by wiping down surfaces such as countertops‚ sinks‚ and shower walls after each use. This simple habit prevents the accumulation of soap scum‚ toothpaste residue‚ and other daily grime.
Introduce pops of color strategically. While black and white form the foundation of your design‚ subtle hints of color can add vibrancy without overwhelming the scheme. A vibrant hand towel‚ a colorful rug‚ or a few strategically placed plants can inject personality and warmth. Consider metallic accents for a touch of glamour. Brass‚ gold‚ or chrome fixtures and accessories can add a luxurious touch‚ complementing the sleekness of the black and white palette. Don’t underestimate the power of texture. Introduce varied textures through bath mats‚ towels‚ and decorative elements to add depth and visual interest; A fluffy bath mat‚ a textured vase‚ or a woven basket can create a sense of comfort and warmth.
Exporting and Sharing My Design
Once I finalized my dream kitchen layoutтАЪ exporting the design was surprisingly straightforward. The online tool offered several options; I chose to download high-resolution imagesтАЪ perfect for sharing with family and friends. The images were incredibly detailedтАЪ capturing every element of my designтАЪ from the subtle grain of the oak cabinets to the precise dimensions of the countertops. I also created a detailed PDF planтАЪ which included measurementsтАЪ appliance specificationsтАЪ and a comprehensive materials list. This was invaluable for potential contractorsтАЪ providing them with all the information they needed to accurately estimate costs and timelines. Sharing my design was incredibly easy. I emailed the images and PDF to several contractors I’d contactedтАЪ and the clarity of the visuals made communication seamless. They were all impressed by the level of detail and professionalism of the digital plans. I also shared my design on social mediaтАЪ posting the images to my Instagram account. My friends and family were amazed by the transformationтАЪ praising the modernтАЪ yet cozy feel of the kitchen. The online tool even allowed me to create a 3D walkthroughтАЪ which I shared with a friend who’s considering a kitchen renovation of her own. She was particularly impressed by the realistic rendering of the lighting and the overall atmosphere of the space. The ability to easily export and share my design was a fantastic feature of the software. It facilitated clear communication with contractorsтАЪ allowed me to easily share my vision with othersтАЪ and even inspired my friend to begin her own kitchen design journey. The entire processтАЪ from initial design to final export and sharingтАЪ was smoothтАЪ efficientтАЪ and incredibly rewardingтАЪ proving that designing a dream kitchen online can be both fun and incredibly practical.
https://callmeconstruction.com/category/bathroom/
[url=https://callmeconstruction.com/building/best-building-materials-for-energy-efficient-houses/]https://callmeconstruction.com/building/best-building-materials-for-energy-efficient-houses/[/url]
AgakRJuhq23k
Refining the Design and Adding Details
With a satisfying L-shaped layout as my baseтАЪ I delved into the finer detailsтАЪ transforming my digital sketch into a truly personalized design. I meticulously selected cabinet styles from the extensive library offered by the softwareтАЪ opting for sleekтАЪ modern shaker-style cabinets in a warmтАЪ honey-toned oak finish. The program allowed me to visualize these choices in real-timeтАЪ rotating the cabinets to ensure they complemented the overall aesthetic. NextтАЪ I chose countertops. I initially considered graniteтАЪ but the virtual rendering showed it clashing slightly with the cabinet color. I then experimented with quartzтАЪ settling on a beautifulтАЪ light-grey option that beautifully contrasted with the oak. The software’s realistic rendering capabilities were invaluable here. I spent a considerable amount of time tweaking the backsplashтАЪ finally settling on a subway tile pattern in a soft whiteтАЪ which provided a clean and classic look. Adding lighting was another key step. I strategically placed recessed lighting above the countertops and pendant lights above the islandтАЪ creating a warm and inviting ambiance. I even experimented with different flooring optionsтАЪ virtually laying down various types of tile and hardwood to see how they interacted with the rest of the design. I was particularly pleased with a light-colored oak wood floor that tied in seamlessly with the cabinetry. Beyond the major elementsтАЪ I focused on the smaller details. I carefully selected hardwareтАЪ opting for brushed nickel pulls and knobs that added a touch of sophistication. I also integrated various appliancesтАЪ choosing models based on their size and aestheticsтАЪ ensuring they fit harmoniously within the design. The software allowed me to fine-tune every aspectтАЪ from the placement of outlets to the positioning of spice racksтАЪ ensuring a highly functional and visually appealing kitchen. It was a truly rewarding processтАЪ seeing my initial concept evolve into a cohesive and detailed designтАЪ ready to be shared and potentially implemented in the real world. The level of customization was impressiveтАЪ allowing me to create a space that was uniquely mine.
With my chosen design toolтАЪ KitchenCraft ProтАЪ selectedтАЪ the next step was inputting my kitchen’s precise measurements. This proved surprisingly straightforward. The software guided me through a step-by-step processтАЪ prompting me to enter the length and width of each wallтАЪ the location of windows and doorsтАЪ and the dimensions of existing fixtures like sinks and ovens. I found the interface incredibly intuitiveтАЪ with clear instructions and helpful visual aids. I even appreciated the option to upload a floor plan image to assist with the process. InitiallyтАЪ I struggled a bit with accurately measuring some awkwardly shaped alcovesтАЪ but the platform’s customer support chat was incredibly helpfulтАЪ providing quick and efficient guidance. Once the dimensions were finalizedтАЪ I began to personalize the design. This is where the fun really started! I selected my preferred cabinet stylesтАЪ choosing from a comprehensive library of options ranging from sleek modern designs to more traditionalтАЪ rustic styles. I meticulously chose the colorsтАЪ finishesтАЪ and countertop materialsтАЪ experimenting with different combinations to find the perfect aesthetic. I even incorporated my existing appliancesтАЪ ensuring they fit seamlessly into the new layout. The software allowed for precise placement of every elementтАЪ down to the smallest detail. I spent hours tweaking and refiningтАЪ meticulously considering factors such as workflow efficiency and aesthetic harmony. The process felt like playing a sophisticated digital puzzleтАЪ and the satisfaction of seeing my vision slowly take shape on the screen was incredibly rewarding. I discovered that the software’s flexibility allowed me to explore different layouts and experiment with various design choices without any commitmentтАЪ a feature I truly appreciated. It was a crucial step in ensuring my final design would be both functional and visually appealing.
After inputting my measurements and preferencesтАЪ I dove headfirst into the exciting world of layout experimentation. KitchenCraft Pro offered a plethora of optionsтАЪ from the classic galley style to the more spacious L-shape and U-shape designs. I started by exploring the galley layoutтАЪ digitally dragging and dropping cabinets and appliances to visualize the workflow. I quickly realized it wouldn’t suit my needs тАУ the limited counter space was a major drawback. NextтАЪ I experimented with an L-shape configurationтАЪ strategically placing the sinkтАЪ stoveтАЪ and refrigerator to form an efficient work triangle. This felt more promising. I meticulously adjusted the placement of islands and peninsulasтАЪ carefully considering their impact on traffic flow and overall spaciousness. The software’s intuitive drag-and-drop functionality made this process remarkably easy and enjoyable. I even tried a daring U-shaped designтАЪ envisioning a grandтАЪ chef-like workspace. While initially appealingтАЪ I found it slightly cramped for my needs. The software allowed me to easily switch between different layoutsтАЪ instantly visualizing the impact of each change. I spent hours tweaking the arrangement of cabinetsтАЪ appliancesтАЪ and workspacesтАЪ constantly evaluating the practicality and aesthetic appeal of each configuration; I played around with different cabinet depths and widthsтАЪ experimenting with the placement of pantry units and maximizing storage space. I even considered adding a breakfast bar to one of the layoutsтАЪ envisioning family gatherings around it. The ability to instantly see the results of my adjustments was invaluableтАЪ allowing me to make informed decisions based on both functionality and personal preference. It was a truly iterative processтАЪ refining and perfecting the design until I found the perfect balance between form and function. Through this experimentationтАЪ I discovered that the L-shape layoutтАЪ with a cleverly positioned islandтАЪ provided the optimal blend of efficiency and spaciousness for my kitchen.
https://callmeconstruction.com/bedroom/my-master-bedroom-makeover-choosing-the-perfect-wooden-bed/
[url=https://callmeconstruction.com/bathroom/mediterranean-small-bathroom-design-ideas/]https://callmeconstruction.com/bathroom/mediterranean-small-bathroom-design-ideas/[/url]
AgakRJuhq23k
Choosing the Right Online Tool
After inputting my measurements and preferencesтАЪ I dove headfirst into the exciting world of layout experimentation. KitchenCraft Pro offered a plethora of optionsтАЪ from the classic galley style to the more spacious L-shape and U-shape designs. I started by exploring the galley layoutтАЪ digitally dragging and dropping cabinets and appliances to visualize the workflow. I quickly realized it wouldn’t suit my needs тАУ the limited counter space was a major drawback. NextтАЪ I experimented with an L-shape configurationтАЪ strategically placing the sinkтАЪ stoveтАЪ and refrigerator to form an efficient work triangle. This felt more promising. I meticulously adjusted the placement of islands and peninsulasтАЪ carefully considering their impact on traffic flow and overall spaciousness. The software’s intuitive drag-and-drop functionality made this process remarkably easy and enjoyable. I even tried a daring U-shaped designтАЪ envisioning a grandтАЪ chef-like workspace. While initially appealingтАЪ I found it slightly cramped for my needs. The software allowed me to easily switch between different layoutsтАЪ instantly visualizing the impact of each change. I spent hours tweaking the arrangement of cabinetsтАЪ appliancesтАЪ and workspacesтАЪ constantly evaluating the practicality and aesthetic appeal of each configuration; I played around with different cabinet depths and widthsтАЪ experimenting with the placement of pantry units and maximizing storage space. I even considered adding a breakfast bar to one of the layoutsтАЪ envisioning family gatherings around it. The ability to instantly see the results of my adjustments was invaluableтАЪ allowing me to make informed decisions based on both functionality and personal preference. It was a truly iterative processтАЪ refining and perfecting the design until I found the perfect balance between form and function. Through this experimentationтАЪ I discovered that the L-shape layoutтАЪ with a cleverly positioned islandтАЪ provided the optimal blend of efficiency and spaciousness for my kitchen.