
You should be able to fix and replace the lamp switches, wires, and other minor issues by yourself because that is the simplest thing you can do. If you want to replace a 3-way lamp switch by yourself, you are at the right spot.
I am gonna tell you the simplest way to replace a 3-way lamp switch.
Lamps are not only illuminating a certain area but also it is a perfect decorative element. A 3-way lamp is also known as a tri-light which has three different ways to light a bulb with three output levels of light.
High, medium, and low.
Things you should consider before replacing a 3-way lamp switch:
- For a 3-way turn lamp switch, you should have a light bulb with at least two brightness levels
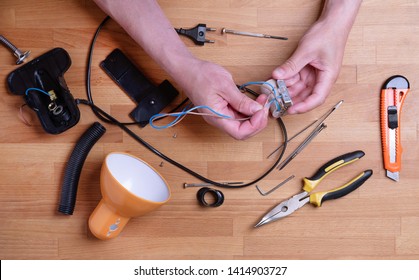
- You should have a wire cutter to cut the wires
- Must check the condition of the lamp’s cord, and replace it if needed
- While replacing a cord you have to be careful to match the hot and neutral wire accurately to the appropriate screws
Contents
Replacing a 3-way lamp switch
Gathering the Supplies
Before starting the project you will need to gather a few supplies. Most importantly, make sure that you know which type of 3-way switch you are replacing. The most common types are rotary and toggle switches.
You can usually find this type of information printed on the side of existing switches.
Now that you’ve identified your existing switch, it’s time to gather the supplies. You will need a new 3-way switch of your choice, plus a screwdriver and needle nose pliers. If you haven’t already purchased the new switch, be sure to select one that is compatible with your existing wiring.
Removing the Old Switch
The first step in replacing your 3-way switch is to remove the old one. Before you begin, make sure to turn off the circuit breaker that supplies power to the lamp. Once that’s done, unscrew and remove the switch plate cover from the wall.
Next, use a screwdriver to loosen and pull out any screws that are holding the old switch in place. Then, carefully pull the switch out of the wall. If you have trouble removing it, use needle nose pliers to grip and twist the wire connector tabs until they come loose.
Finally, take a few moments to inspect and note the wiring setup for the old switch. This will help when it’s time to install the new one.
Installing the New Switch
Once you’ve removed the old switch, it’s time to install the new one. Begin by connecting the wires to their corresponding terminals on the new switch. Make sure that all connections are secure and that there is no exposed wiring.
After you have connected all of the wires, slide the new switch into place in the wall. Secure it with screws and replace the switch plate cover.
Lastly, turn the circuit breaker back on to restore power to the lamp. Test out your new 3-way switch and make sure everything is working properly.
Troubleshooting
If your new switch doesn’t seem to be working correctly, double-check all of your connections to make sure that everything is secure. It’s also a good idea to inspect the wiring for any signs of damage or corrosion.
If you still can’t seem to resolve the issue, it may be time to call in an electrician. They can ensure that all of your electrical components are up to code and working properly.
Tips for Replacing a 3-Way Lamp Switch
Replacing a 3-way lamp switch isn’t as difficult as it may seem. Here are some tips to keep in mind when replacing your switch:
- Always make sure that you turn off the power to the lamp before attempting any repairs or replacements.
- If the wiring setup is different from your old switch, take some time to document and note it down, so that you can reference it later.
- Take your time when connecting wires to terminals on the new switch, as any loose connections could be dangerous.
- Inspect all connections for any signs of corrosion or damage to ensure that they are secure and reliable.
- If you are still having trouble, don’t hesitate to contact a professional for help.
How to repair a 3-way Lamp Switch
If your 3-way lamp switch suddenly stops working, you may be able to repair it without replacing the entire fixture. Here is an overview of how to replace a 3-way lamp switch and get light back in your room:
Tools Needed
- Phillips head screwdriver
- Needle nose pliers
- Wire strippers
- Voltage tester or multimeter
Step 1: Identify the Wiring Configuration
The first step in replacing a 3-way lamp switch is to identify the wiring configuration of the existing switch. This can be done by removing the cover plate from the wall and inspecting the connections. Make sure to note the position and color of each wire, as well as which set of screws they are connected to (common, traveler 1, or traveler 2).
Step 2: Connect New Switch
Once you have identified the wiring configuration, it’s time to connect the new switch. Start by disconnecting all wires from the old switch, then connect them to the new one in the same configuration. Make sure that all connections are secure and check for any shorts with a voltage tester or multimeter.
Step 3: Test Switch
Once you have connected the wires to the new switch, turn on your power supply and test it out. Flick each switch a few times to make sure they work correctly, then reinstall the cover plate.
With these steps, you should be able to successfully repair your 3-way lamp switch and restore light to your room. Good luck!
Troubleshooting Tips
If your new 3-way lamp switch isn’t working, it could be due to a number of issues. Here are some troubleshooting tips:
- Make sure all wires are securely connected to the switch.
- Check for any shorts or loose connections with a voltage tester or multimeter.
- Ensure that the wiring configuration is correct and matches the old switch.
- Test each connection individually to make sure they work correctly.
- If the switch is still not working, it may be defective and you may need to get a replacement.
By following these steps and troubleshooting tips, you should be able to repair your 3-way lamp switch quickly and easily. With just a few simple tools and patience, you can keep your lighting running smoothly for years to come.
Related Topic:
Conclusion
Replacing a 3-way lamp switch is a relatively straightforward process that can be done by just about anyone with a few basic tools. Just make sure to take your time and follow the steps outlined above for the best results, and don’t hesitate to call in an electrician if you experience any problems.
With the right preparation and knowledge, you can quickly replace your 3-way switch and breathe new life into your lamp.
FAQs
Can I control the light output of a lamp?
Yes, you can control the light output of a lamp because a 3-way lamp switch has three different levels of light output high medium, and low.
How much time does it take to replace a 3-way lamp switch?
Replacing a 3-way lamp switch is easiest. If you follow the steps in the right sequence with the proper tools, you can replace them in ten minutes or less.
Is it safe to replace a 3-way lamp switch by yourself?
Yes, it is safe. Actually, you have to keep it safe. Just unplug the lamp wire from the electrical outlet. Don’t drop the bulb or lampshade on the floor. These are minor things you have to consider.
Is it dangerous to replace a 3-way switch?
It’s not necessarily dangerous, but it can be if done improperly. Always make sure to turn off the power before attempting any repairs or replacements, and double-check all connections for any signs of damage or corrosion. If you are unsure about the safety of your wiring setup, contact a professional for help.
2 thoughts on “How to Replace a 3-way Lamp Switch”